
Step-by-step guide: How to mint NFTs on Ergo
To learn how to auction your NFT directly please check the following video: https://www.youtube.com/watch?v=OAHFHrHq3Oc
Today, we’re going to show you how to mint your own Non-fungible tokens (NFT) on Ergo. NFTs are the latest craze in the crypto world. They are here to stay, allowing anyone to monetize their digital artworks, improving ownership and rewards for the gaming world, and shaking up many other industries.
As a layer1 project focusing heavily on improving security, scalability, and usability for the world of DeFi, the Ergo team has been working tirelessly on providing the best solutions for NFTs.
In order to encourage the community to try out the NFT features provided in the Ergo ecosystem, we have launched a NFT artwork contest and recently announced the winners of the three selected categories. They have received up to 2000 ERG in prizes, split by the winners of three different categories.
Part 1: Setting up and funding your ERG wallet
Step 1: First thing you need is a wallet. We suggest using the Yoroi wallet extension for chrome which is easy to install and to use. Please check this video for more info: https://www.youtube.com/watch?v=sYu-DtGjjWI
Step 2: Once this is done, you’ll need to fund your wallet. Transaction fees associated with NFT issuance is only a couple of cents . You can buy ERGO through multiple exchanges in case you haven’t done so already. Check the exchange that would best fit your needs here, create an account, or login and purchase ERG with fiat or other cryptos.
Step 3: Now that you have acquired ERG, you’ll need to send it to your own wallet. Exchange wallets aren’t suitable for interacting with smart contracts. In Yoroi, navigate to “Receive” and then copy your wallet address. You can do this by clicking the “copy” symbol next to your wallet address.
Step 4: On the exchange, go to withdrawals and past your address in the correct field. Withdraw the desired amount and wait for it to be confirmed. This process will vary according to the exchange chosen, and additional KYC/verifications may be needed, so please make sure to check this carefully when choosing your exchange.
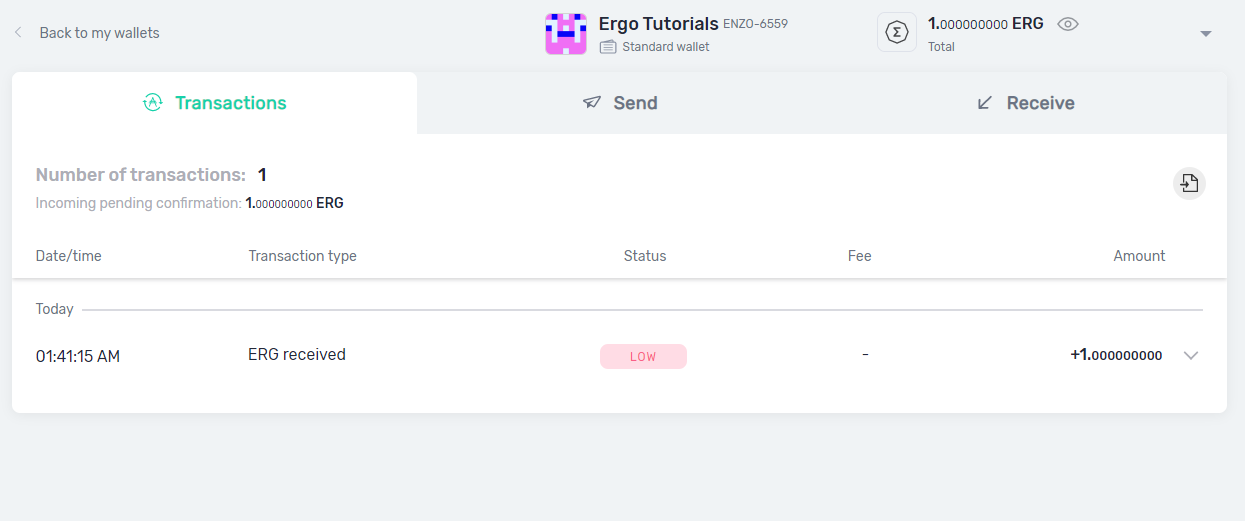
Step 5: Once the transaction has been initiated and confirmed on the blockchain, you’ll be able to see your balance on the ERG wallet created. You can verify this on the left upper corner. If you cannot see your balance click the “eye” symbol next to “ERG”
Part 2: Configure your Ergo Utils account wallet
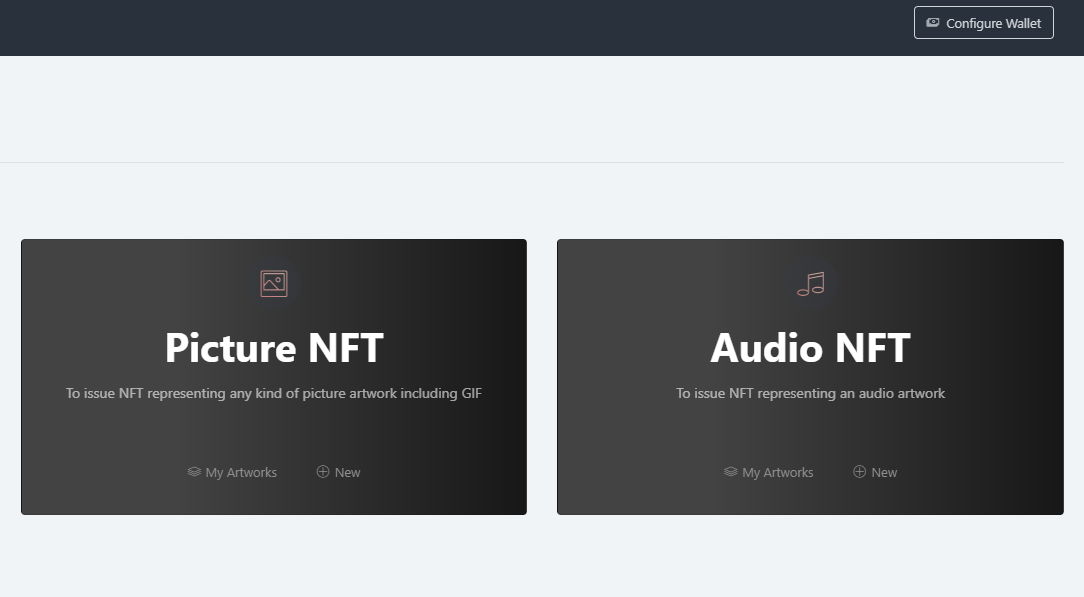
Now that we have successfully created and funded our Ergo wallet, it’s time to configure the Ergo Utilis account. Ergo Utils allows you to perform simple actions, including asset and NFT issuance as well as Airdrop creation through an easy to use graphic user interface. We will be using Ergo Utils to mint our NFT.
Step 1: Go to Ergo Utils via this link: https://ergoutils.org/
Step 2: On the upper left right corner, click “Configure Wallet”
Step 3: A Popup window will prompt you to add your ERG address. This step is similar to the one performed in the previous part of the guide. Simply copy your wallet address and paste it in the “Address” field.
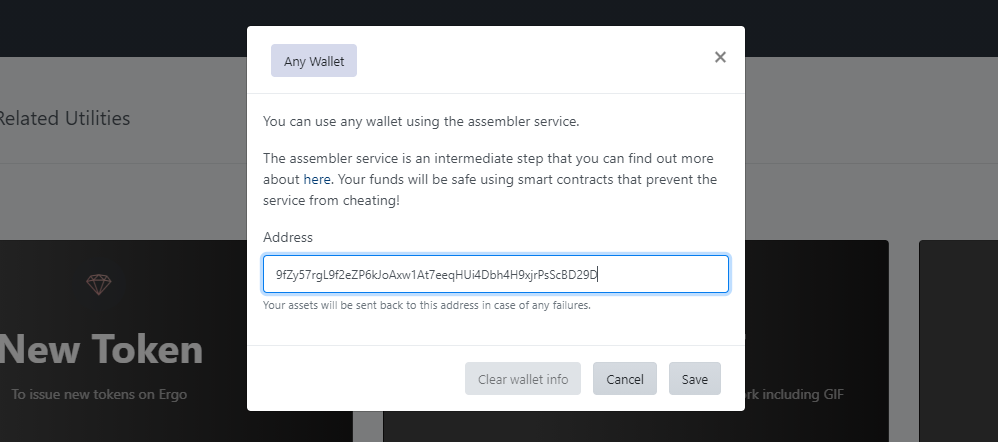
Step 4: Confirm that the wallet address has been correctly entered and click “Save”
Part 3: Mint your NFT
Now it’s time to mint your NFT. While both artwork and audio NFTs can be issued, we’ll use the Artwork NFT
Step 1: On the New Artwork NFT section, click the “+New” button

Step 2: A pop-up window will prompt you to fill out several fields:
- Artwork Name
- Artwork Description
- Artwork File
Fill these out accordingly. We will be using a dummy name, description and artwork for the purpose of this tutorial. You can add a link or description of the artwork in the description field depending on how complex the description is. You can also Upload the Artwork if you wish to preserve the image online but this is not required for the purpose of this tutorial.
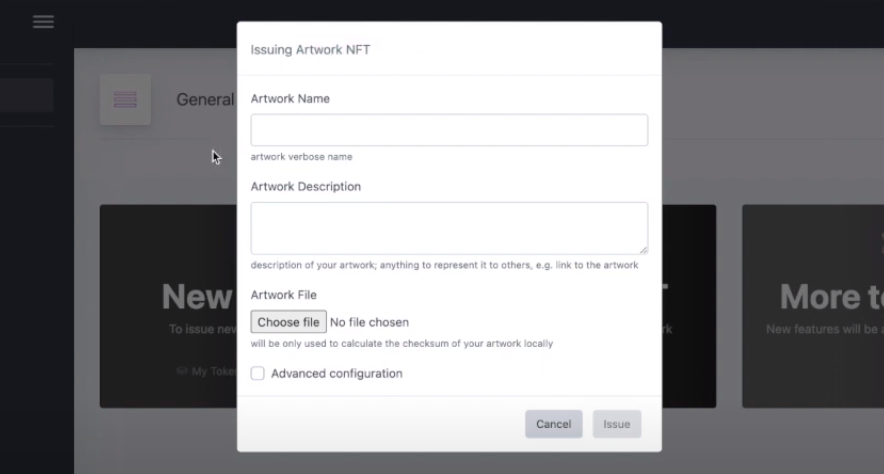
Optional: You may also click “Advanced configuration and choose a higher fee for a faster transaction and an alternative wallet address to send your NFT to. This may be useful to gift an NFT or to send to a predefined wallet you have created for this purpose.
We will leave both fields as they are which means a 0.1 ERG will be set as the initial value for the NFT along with the transaction fee and which will also be included in the NFT value (totalling 0.11ERG) the NFT will be sent to the wallet used to configure the Utilis account.
Step 2: Click “Issue”
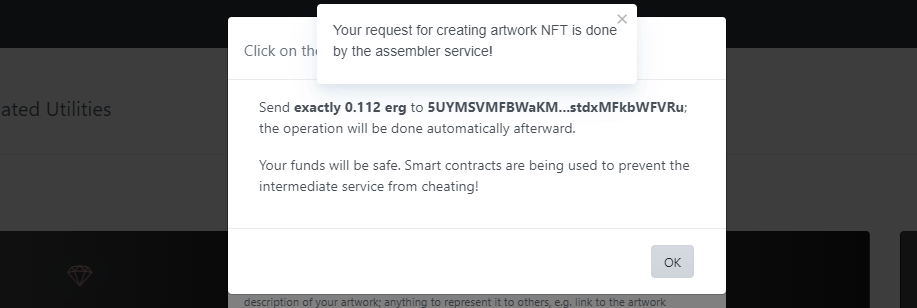
Step 3: A pop-up window will prompt you to send a specific amount of ERG (0.112 in our case) to the wallet displayed. This will be done via a smart contract that will receive the funds and automatically issue your NFT. An additional 0.002 ERG fee is paid to the smart contract.
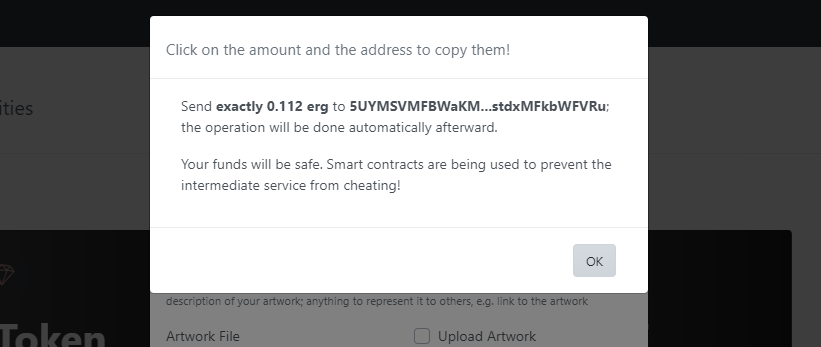
Step 4: Send the exact ERG amount to the wallet. Since we have already covered how to send ERG via the Yoroi wallet, this step should be easy for you. Additional transaction fees will apply.
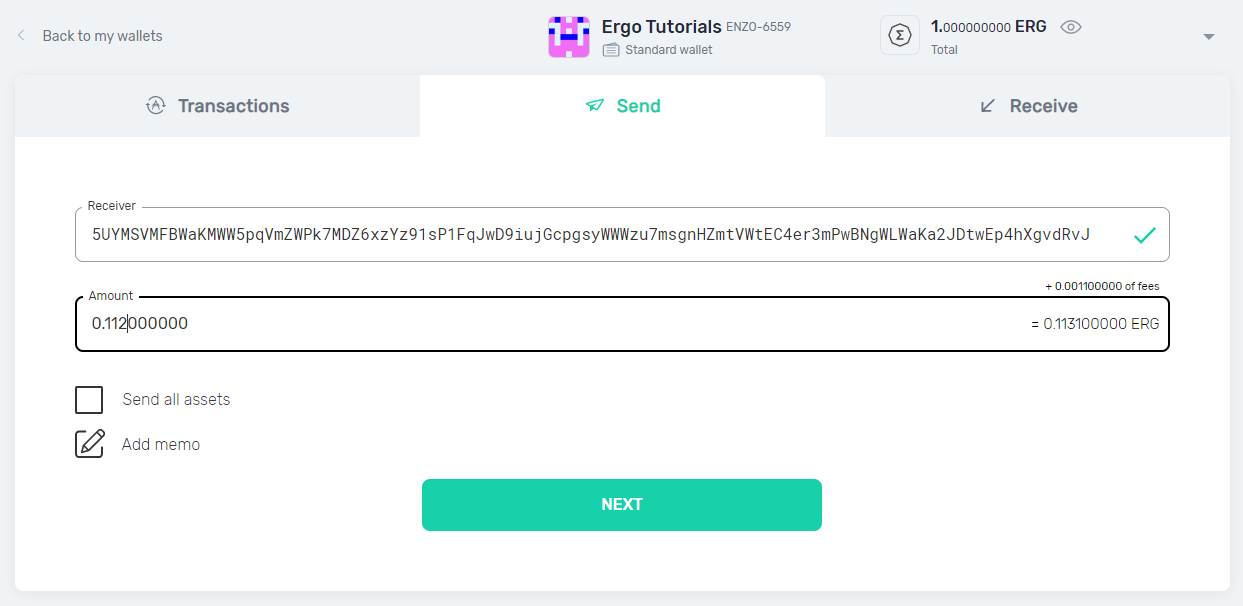
Copy the value and wallet address and send the funds to this address. Once the data has been confirmed you can click “OK”.
Conclusion
You’re all set. You should be able to see the following message in the Ergo Utils platform. Feel free to close the previously open pop-up by clicking “OK” if you haven’t done so already.
You can now check your NFT transactions by clicking “My Artworks”
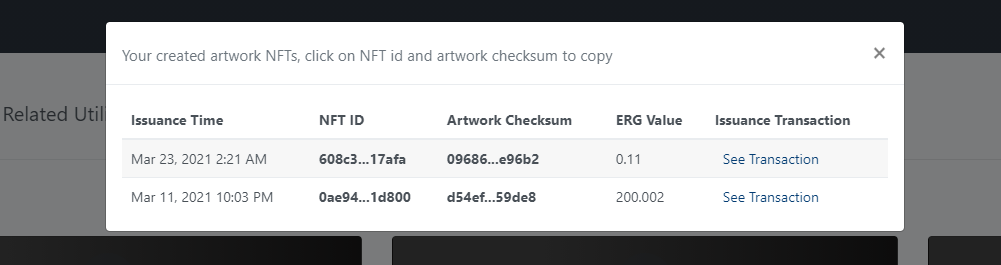
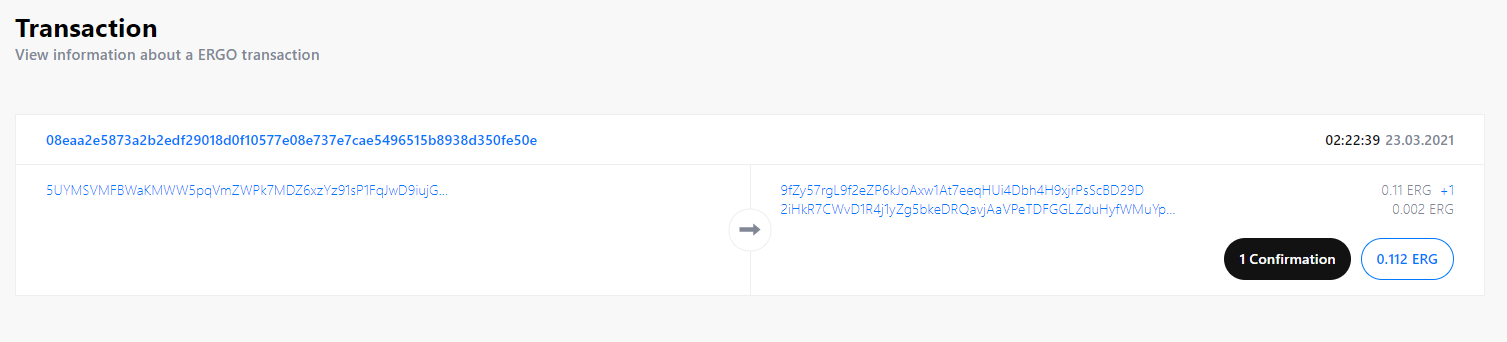
For more details, click “See Transaction”
You’ll be able to see that 0.11 ERG were sent to your wallet and a 0.002 ERG fee was charged for the issuance of the token. The 0.11 ERG is the initial value of the NFT.
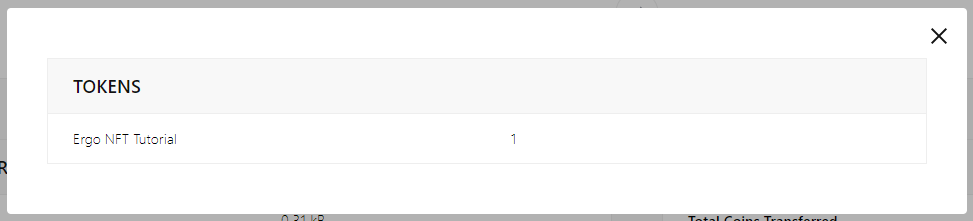
You can also click “+1” to see that the NFT token was sent along with this transaction
You’re all set! You are now the proud owner of a NFT!